지난 글에 이어서 보드 디버깅 진행.
아두이노 메가 기반 컨트롤러 Serial, USB, WIFI, LoRa, 릴레이 디버깅
□ 디버깅 준비 1. 라즈베리파이4 _ 원격 프로그램 업로드 등 관리 2. 제작한 컨트롤러 3. LTE 라우터 - 네트워크는 고정IP를 사용하는 LTE 라우터를 이용한다. - 라즈베리파이는 고정 IP를 사용하며 L
abc0123.tistory.com
지난 글에서는 ATmega2560 MCU를 사용해서 제작한 컨트롤러의 Serial, USB, WiFi, LoRa, 릴레이 디버깅을 진행했었다.
이어서 이번 글에서는 SDI-12, RS485, Ethernet 통신 디버깅을 진행해본다.
1. SDI-12 통신
라이브러리 : SDISerial.h
센서 : ATMOS14 (대기 온도, 습도, 대기압 데이터)

#include <SDISerial.h>
#include <string.h>
#define DATA_PIN 2
#define INVERTED 1

SDISerial connection(DATA_PIN, INVERTED);

void setup() {
  connection.begin();
  pinMode(13, OUTPUT);
  digitalWrite(13, HIGH);
  Serial.begin(9600);//so we can print to standard uart
}

void loop() {
  Serial.println("************** Command *************");
    char * resp = connection.sdi_query("0R0!", 1000); //get data
  Serial.print("DATA:"); Serial.println(resp);
  delay(3000);
}
- 디지털 핀 2번으로 디지털 신호 수신
- SDI-12 통신 프로토콜 "0R0"(0번 주소 센서의 데이터 측정)을 이용하여 데이터 수신.
결과
- 대기압, 대기온도, 대기습도 등의 데이터 수신.

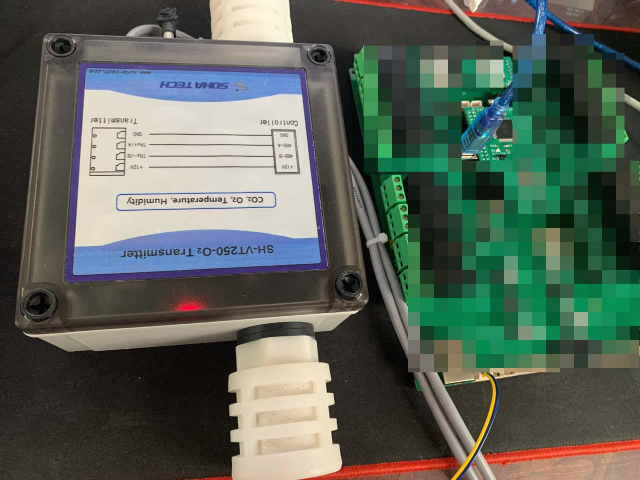
2. RS485 데이터 수신
- 라이브러리 : ArduinoModbus.h
- 포트 : Serial1
- 센서 : SH-VT250-O2 Transmitter
- DE PIN : 12
- 라이브러리 수정
* RS485.h
  -- <RS485.h>
  #ifndef _RS485_H_INCLUDED
  #define _RS485_H_INCLUDED

  #include <Arduino.h>

  #ifdef PIN_SERIAL1_TX
  #define RS485_DEFAULT_TX_PIN PIN_SERIAL1_TX
  #else
  #define RS485_DEFAULT_TX_PIN 1
  #endif

  #ifdef __AVR__
  #define RS845_DEFAULT_DE_PIN 12
  #define RS845_DEFAULT_RE_PIN -1
  #else
  #define RS845_DEFAULT_DE_PIN 12
  #define RS845_DEFAULT_RE_PIN 12
  #endif
* RS485.CPP
RS485Class RS485(SERIAL_PORT_HARDWARE1, RS485_DEFAULT_TX_PIN, RS845_DEFAULT_DE_PIN, RS845_DEFAULT_RE_PIN);
코드
#include <ArduinoModbus.h>

void setup() {
  Serial.begin(9600);
  Serial1.begin(9600); //RS485
  while (!Serial);

  Serial.println("Modbus Temperature Humidity Sensor");
  if (!ModbusRTUClient.begin(9600)) {
    Serial.println("Failed to start Modbus RTU Client!");
    while (1);
  }
}


void loop() {

  if (!ModbusRTUClient.requestFrom(1, HOLDING_REGISTERS, 0x64, 1)) {
    Serial.print("failed to read registers! ");
    Serial.println(ModbusRTUClient.lastError());
  } else {
    short co2 = ModbusRTUClient.read();
    Serial.print("CO2 : "); Serial.println(co2);
  }
  delay(1000);

  if (!ModbusRTUClient.requestFrom(1, HOLDING_REGISTERS, 0x68, 1)) {
    Serial.print("failed to read registers! ");
    Serial.println(ModbusRTUClient.lastError());
  } else {
    short tem = ModbusRTUClient.read();
    Serial.print("TEM : "); Serial.println(tem / 10.0);
  }
  delay(1000);
  if (!ModbusRTUClient.requestFrom(1, HOLDING_REGISTERS, 0x6A, 1)) {
    Serial.print("failed to read registers! ");
    Serial.println(ModbusRTUClient.lastError());
  } else {
    short hum = ModbusRTUClient.read();
    Serial.print("HUM : "); Serial.println(hum / 10.0);
  }
  delay(5000);
}
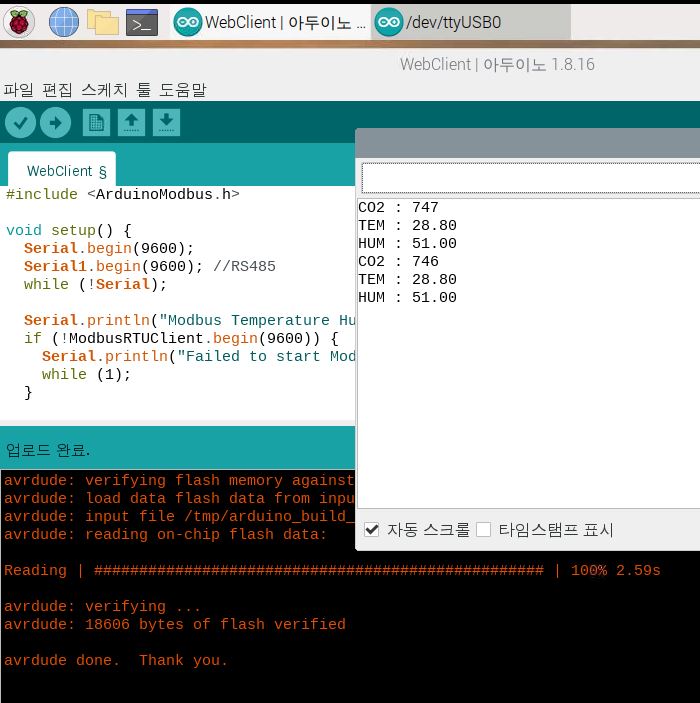
결과
- RS485를 통해 대기의 온도, 습도, CO2 농도 측정값을 전달해주는 센서의 데이터 수신.
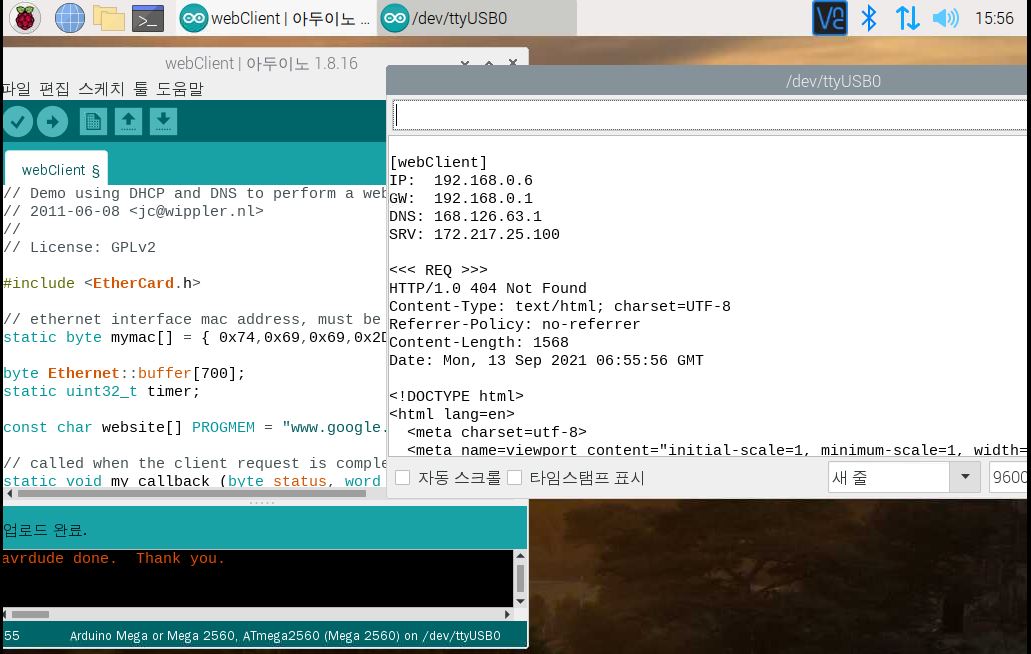
3. ETHERNET 통신 테스트
라이브러리 : EtherCard
코드
// Demo using DHCP and DNS to perform a web client request.
// 2011-06-08 <jc@wippler.nl>
//
// License: GPLv2

#include <EtherCard.h>

// ethernet interface mac address, must be unique on the LAN
static byte mymac[] = { 0x74,0x69,0x69,0x2D,0x30,0x31 };

byte Ethernet::buffer[700];
static uint32_t timer;

const char website[] PROGMEM = "www.google.com";

// called when the client request is complete
static void my_callback (byte status, word off, word len) {
  Serial.println(">>>");
  Ethernet::buffer[off+300] = 0;
  Serial.print((const char*) Ethernet::buffer + off);
  Serial.println("...");
}

void setup () {
  Serial.begin(9600);
  Serial.println(F("\n[webClient]"));

  // Change 'SS' to your Slave Select pin, if you arn't using the default pin
  if (ether.begin(sizeof Ethernet::buffer, mymac, SS) == 0)
    Serial.println(F("Failed to access Ethernet controller"));
  if (!ether.dhcpSetup())
    Serial.println(F("DHCP failed"));

  ether.printIp("IP:  ", ether.myip);
  ether.printIp("GW:  ", ether.gwip);
  ether.printIp("DNS: ", ether.dnsip);

#if 1
  // use DNS to resolve the website's IP address
  if (!ether.dnsLookup(website))
    Serial.println("DNS failed");
#elif 2
  // if website is a string containing an IP address instead of a domain name,
  // then use it directly. Note: the string can not be in PROGMEM.
  char websiteIP[] = "192.168.1.1";
  ether.parseIp(ether.hisip, websiteIP);
#else
  // or provide a numeric IP address instead of a string
  byte hisip[] = { 192,168,1,1 };
  ether.copyIp(ether.hisip, hisip);
#endif

  ether.printIp("SRV: ", ether.hisip);
}

void loop () {
  ether.packetLoop(ether.packetReceive());

  if (millis() > timer) {
    timer = millis() + 5000;
    Serial.println();
    Serial.print("<<< REQ ");
    ether.browseUrl(PSTR("/foo/"), "bar", website, my_callback);
  }
}
결과
- 자동 IP 할당 받고 WebClient 네트워크 연결 확인.